📘 Tutorial run-comfyui-ltx
- This tutorial reflects my own experience on RunPod.
- Always consult the excellent official runpod documentation.
🚀 Starting a Pod
🧩 Choose a Template

Example: 👉 LTX-2 bf16
Steps:
- Choose a GPU.
- Edit template settings if needed.
- Enable volume encryption if desired.
- Click Deploy On-Demand.
📜 Viewing System Logs
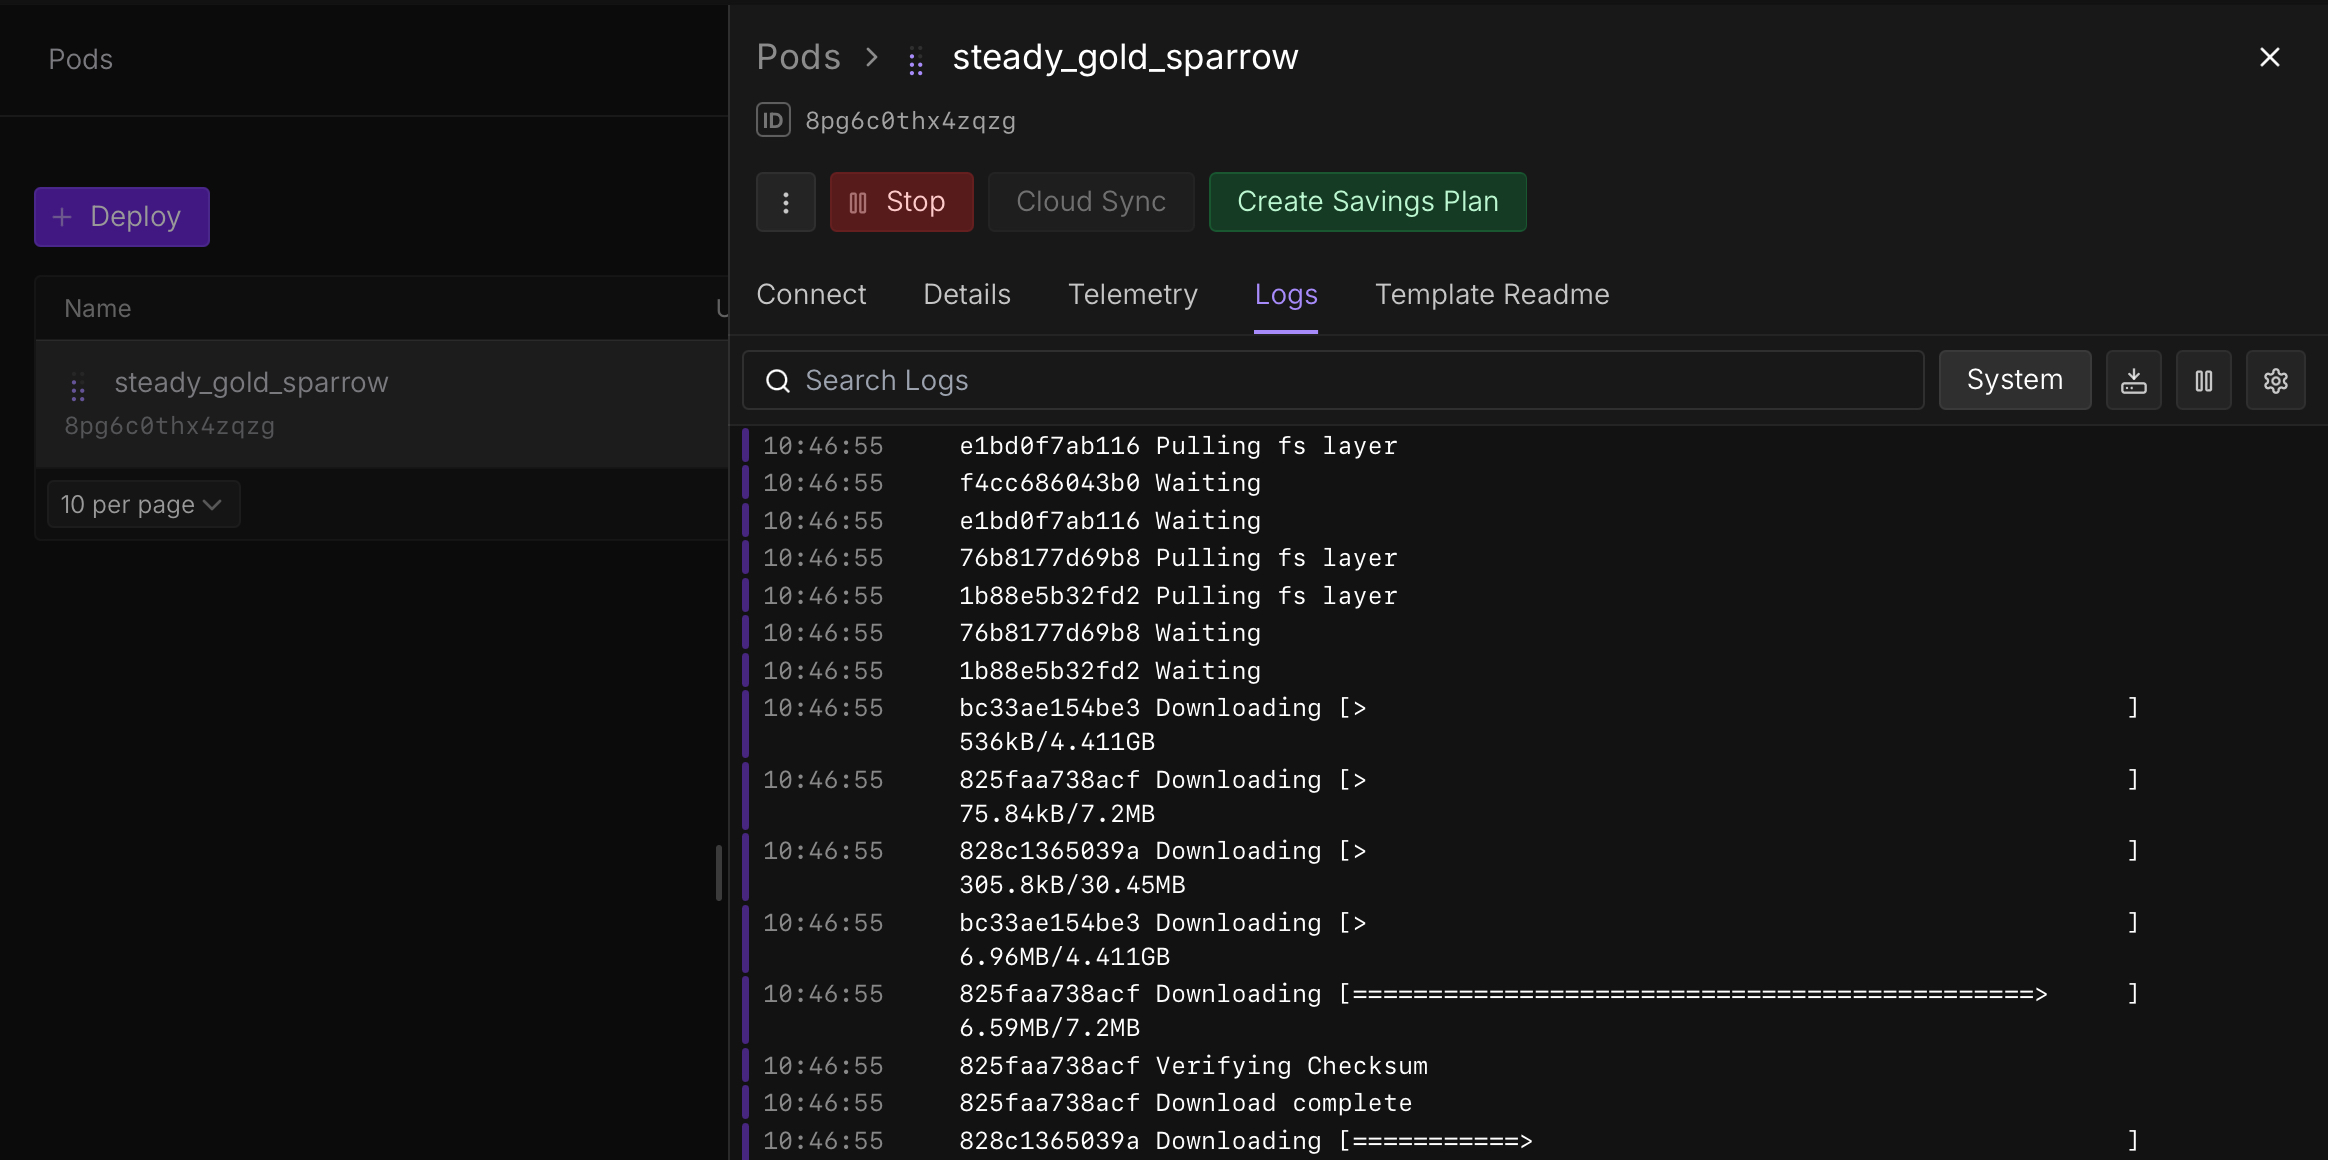
- Go to Logs.
- Loading takes 9–15 minutes depending on region.
- If the image doesn’t begin downloading after 1 minute, delete and redeploy in another region.
Ends with (example):
Digest: sha256:2b56bdd14df7af0d8e7f9bd7978bg9d62d792359f5ea65redd65dcd5816752fc
Status: Image is up to date for ls250824/run-comfyui-wan2:11012026
🐳 Viewing Container Logs
ℹ️ Pod run-comfyui-wan started
ℹ️ Wait until the message 🎉 Provisioning done, ready to create AI content 🎉
When you see:
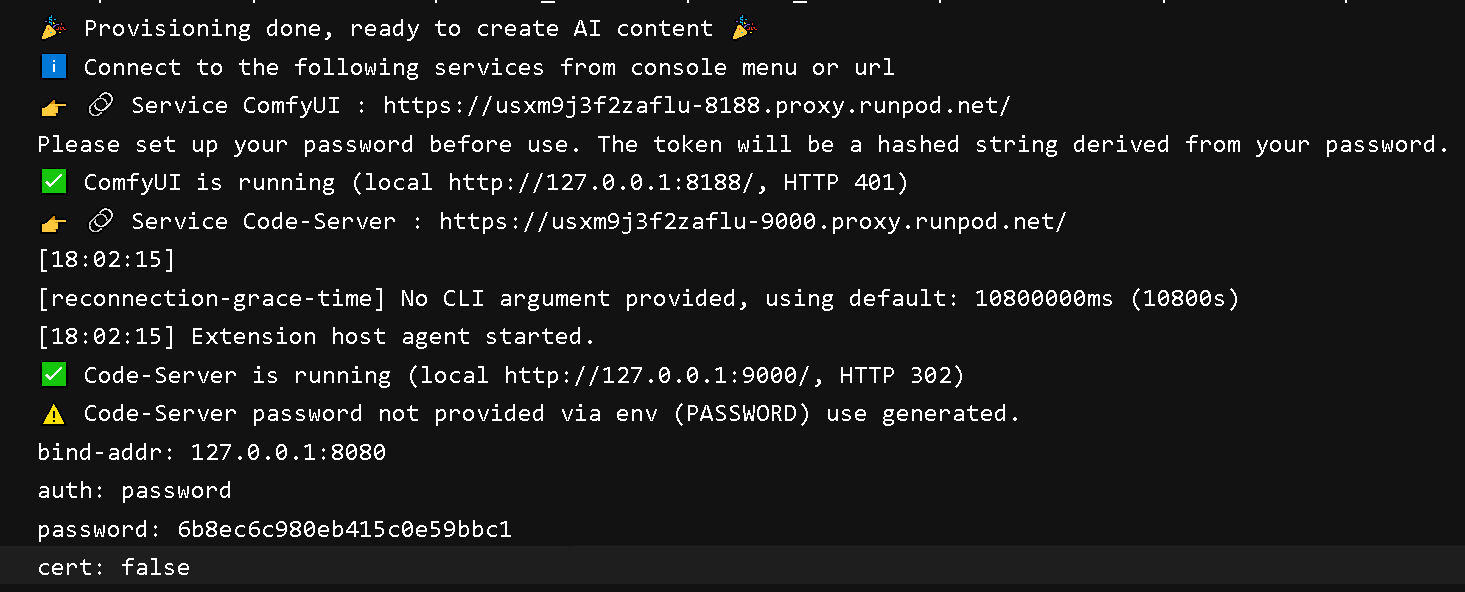
→ Your pod is ready.
🔌 Connecting to Your Pod

⚠️ Not ready – Make sure your service is running!
Try to Connect with the pod-id and the port number to the proxy. You can find the url’s at the end of the log file.
- ComfyUI:
https:<pod-id>-8188.proxy.runpod.net/ - Lora Manager:
https:<pod-id>-8188.proxy.runpod.net/loras - Code-Server:
https:<pod-id>-9000.proxy.runpod.net/
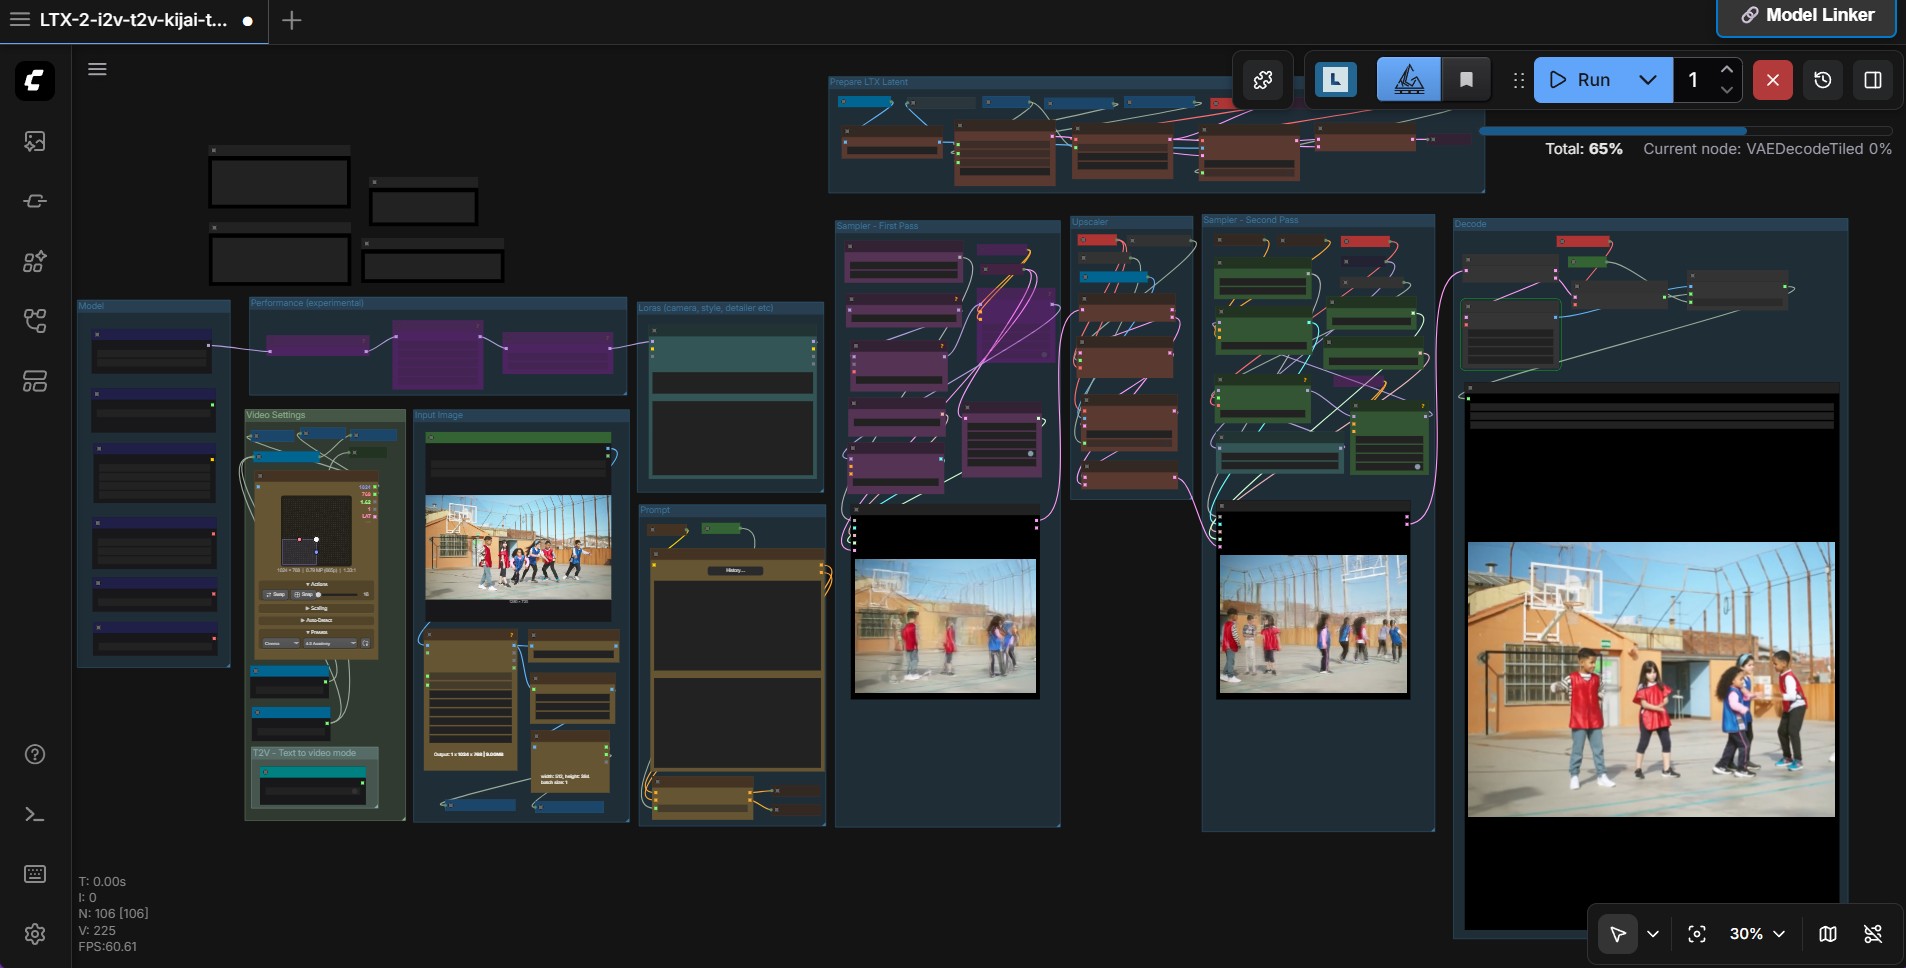
🎨 ComfyUI
- Select tab Connect → ComfyUI
- Set username/password
- Load a workflow
- Press Run
- Monitor GPU/RAM via Telemetry

⚠️ ComfyUI's screen remains blank
- Wait one minute and try again.
- Restart your browser and/or clear cache.
- Try with another browser (brave, chrome, edge).
💻 Web Terminal

- Select tab Connect
- Enable web terminal
- Provides terminal access directly in your browser.
🧑💻 Code-Server Login
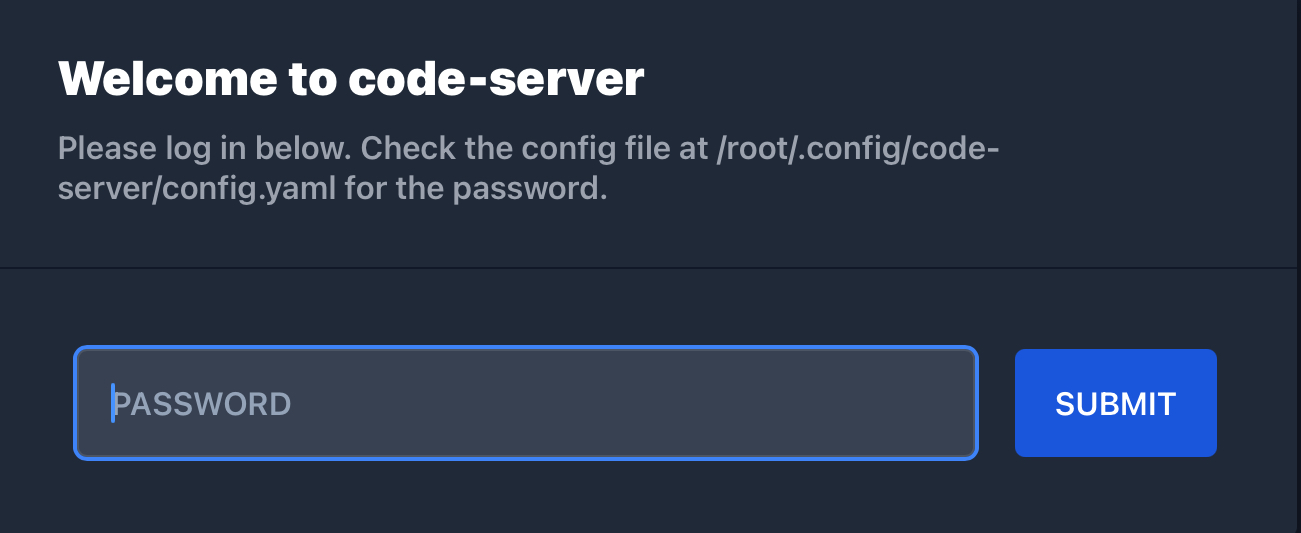
No "PASSWORD" set
- Copy the password displayed at the end of the container log file of the Runpod console or open the web terminal and enter.
Copy the password → log in via the Code-Server service on tab Connect.
Information in pod available
⚠️ Code-Server's screen remains blank
- Wait one minute and try again.
- Restart your browser and/or clear cache.
- Try another browser (brave, chrome, edge).
"PASSWORD" set as env in Runpod template
Log in via the Code-Server service on tab Connect.
🔐 Secrets
Useful secrets:
PASSWORDCIVITAI_TOKENHF_TOKEN
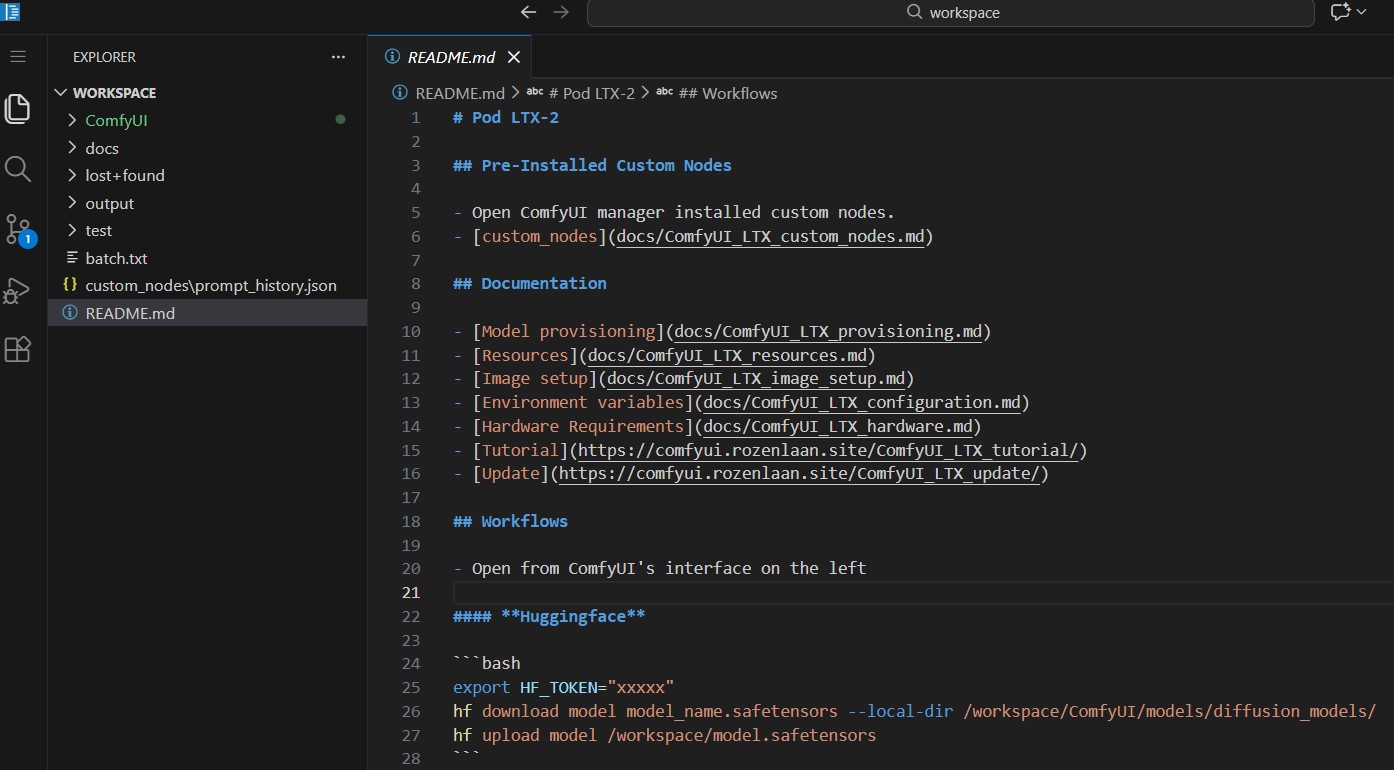
📥 Downloading Models and LoRAs
From web terminal or Code-Server.
🧩 CivitAI
If no "CIVITAI_TOKEN" was set, create or use a free token from the civitai website.
export CIVITAI_TOKEN=“xxxxx”
civitai “<download-link-on-civitai>” /workspace/ComfyUI/models/<loras, etc>
Download for example CivitAI
civitai "https://civitai.com/api/download/models/2377549?type=Model&format=SafeTensor" /workspace/ComfyUI/models/loras/
civitai "https://civitai.com/api/download/models/2377566?type=Model&format=SafeTensor" /workspace/ComfyUI/models/loras/
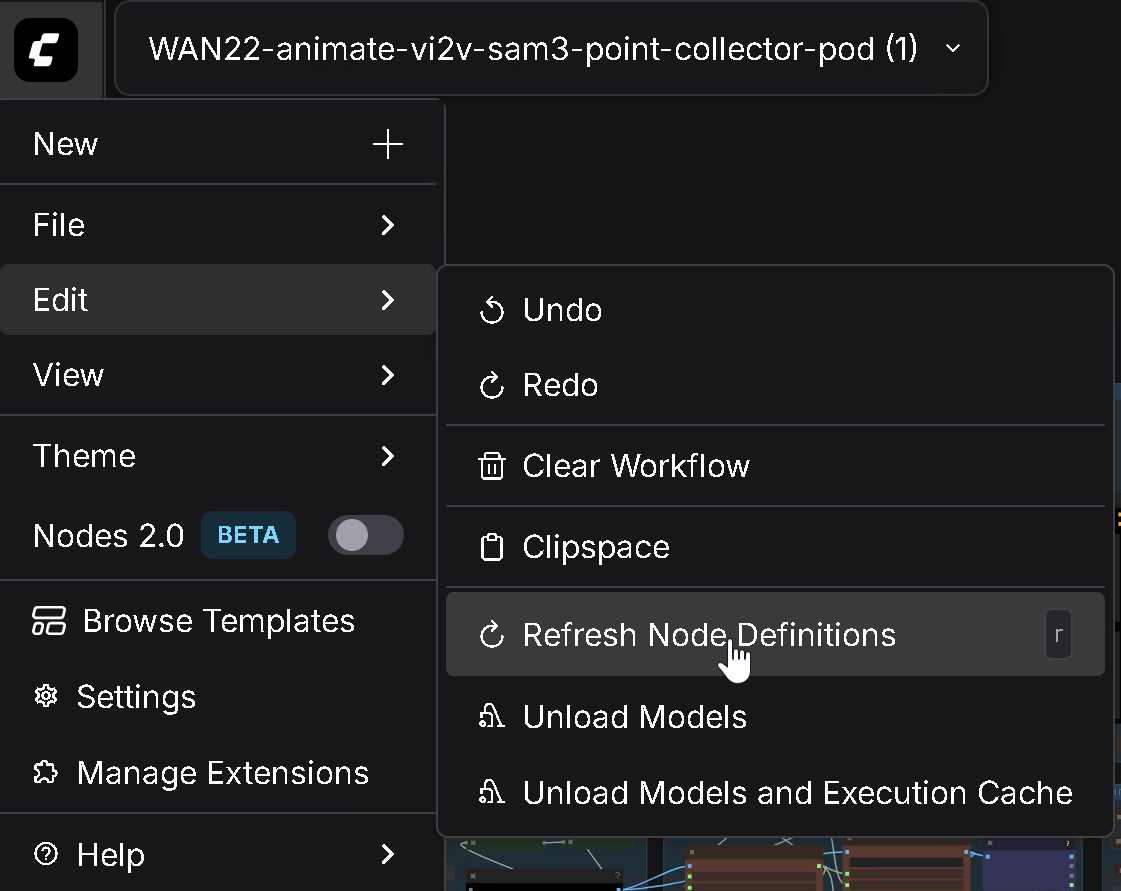
Refresh ComfyUI pressing key r.
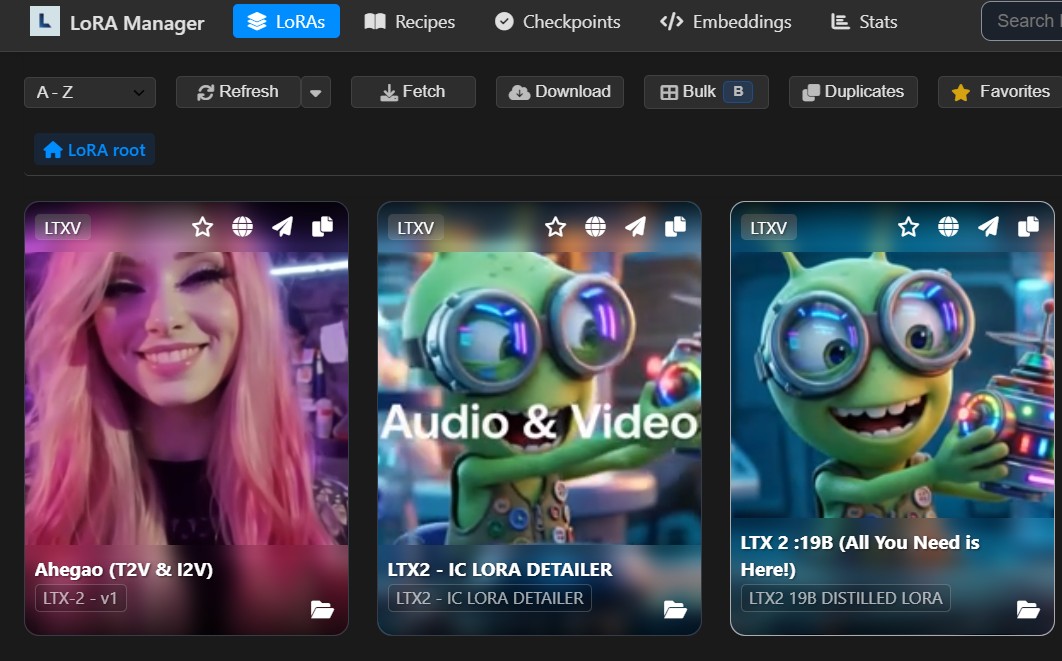
🧩 ComfyUI-Lora-Manager
Launch web interface

- Topbar ComfyUI.
- Url displayed at end of container log file.
Civitai token (needed for download)
- Go to preferences and add your token if not set before starting the pod (CIVITAI_TOKEN).
Topbar

- Press Refresh and Fetch to download images for lora's available in the pod.
- Press Download and add the civitai's URL (not download link).
Integration basic
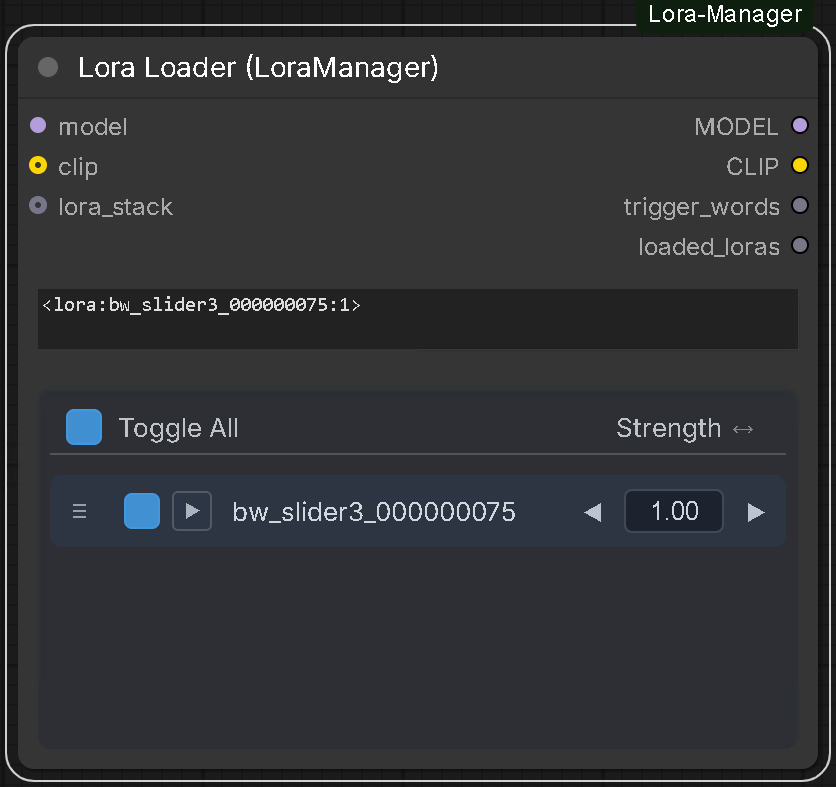
- Add node Lora-Loader (LoraManager) to your ComfyUI workflow.
- Press the Paper Airplane in the Lora-Manager web interface.
- Your lora is available in your workflow.
- Add your model for LTX to both lora loaders and adjust strength.
☁️ HuggingFace
"HF_TOKEN" is mandatory but needed for gated sites or upload.
Login:
or set token:
Download example from Huggingface.
hf download ricecake/wan21NSFWClipVisionH_v10 wan21NSFWClipVisionH_v10.safetensors --local-dir /workspace/ComfyUI/models/clip_vision
Refresh ComfyUI pressing key r.
🧩 ComfyUI-manager
- Topbar or menu

🧩 Restart pod
- ⚠️ To restart ComfyUI restart the pod from runpod’s console (no information loss).
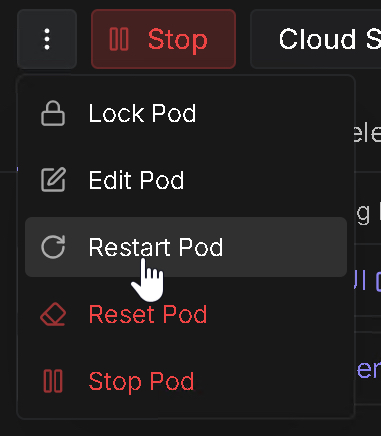
🧩 Stop and restart a pod
- No information loss as ComfyUI is copied to the /workspace volume.
- Use this option to pause your pod.
⚠️ Be aware that it is possible that no GPU is available when you restart the pod.
- Before stopping the pod copy your creations to cloud/local.
- You can still access to pod from the console (0.5 vCPU and little memory).
🔄 Uploading & Downloading Files
☁️ Cloud Sync
Free dropbox

- Reliable and fast upload and download for large files.
- Go to Dropbox developers
- Create an app to connect with runpod.io.
📦 runpodctl
Speed
- Fine for downloading files from your pod.
- Problematic for uploading large files to your pod with slow connections (timeouts).
- Perfect for transfering files between pods.
Installation
- You need to install a client on your local computer.
- You do not need an api key to upload/download to/from your pod.
🔧 Advanced Features
🔐 SSH / SCP / SFTP
Docs.
Key generation
- Linux has ssh-keygen already installed to generate keys.
- Windows install Git to get ssh-keygen.
- Put your public key on runpod.io keep your private key on your local computer.
Apps.
- Use Shellfish, Putty, Tabby terminal or shell/bash.
- File transfer Shellfish or WinSCP.
🔑 RunPod API
Useful when the web console is out (examples are outages from AWS and Cloudflare).
Using runpod.io API
- Docs.
- Install with "sudo apt install curl" on Ubuntu.
curl --request GET \
  --url https://rest.runpod.io/v1/pods \
  --header 'Authorization: Bearer <api-key>'

curl --request POST \
  --url https://rest.runpod.io/v1/pods/{podId}/stop \
  --header 'Authorization: Bearer <api-key>'

curl --request DELETE \
  --url https://rest.runpod.io/v1/pods/{podId} \
  --header 'Authorization: Bearer <api-key>'
Using runpodctl to start/stop your pod with your api key.
- Docs.
- Install client on local computer.
- Use Shell/PowerShell or Bash.